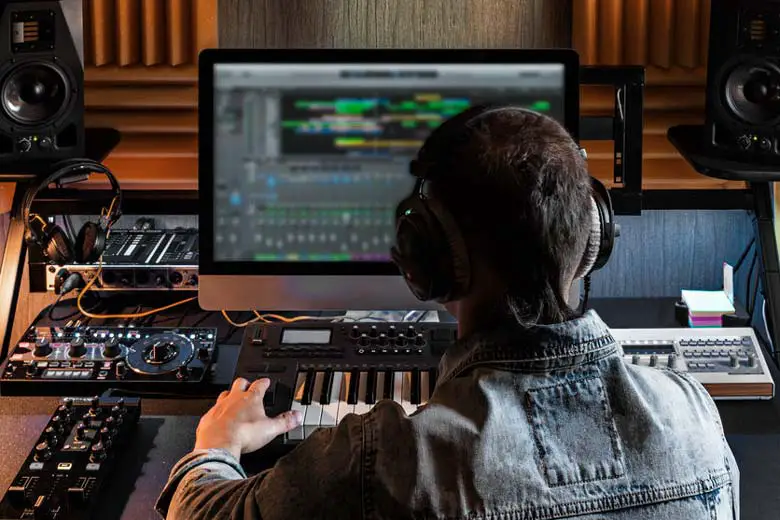
When you’re new to the world of sound mixing, it’s easy to look at an equalizer program and despair. What on earth is a “frequency,” what are all those buttons, and what do they have to do with the sound of your mix? Luckily, an equalizer system, or EQ, can be very simple to use when you familiarize yourself with the jargon and learn its basic functions.
To use an equalizer to get that perfect sound, prioritize cutting unpleasant noises on your recording. You can also enhance the mix by highlighting the vocalist or lead instrument tracks. Avoid making changes on solo tracks; the song’s quality will depend on the recording more than on an EQ.
This article will detail the language of sound mixing programs and help understand how adjusting different frequencies can transform your song’s sound. Mixing music can seem intimidating, but all you need to do is learn the tools of the trade.
Why Use an Equalizer?
Many musicians are skeptical of equalizing technology. After all, we’ve been recording music for only around 150 years, and audio equalizers have only been in use since the 1920s. It’s easy to write an EQ off as an unnecessary, newfangled tool for pop artists.
However, in the era of multiple streaming platforms, there are more reasons to use an EQ than ever. Before dismissing an EQ as a crutch for poor musicianship, consider the following:
Live Performances Rely on the Listener’s Experience
Listeners in attendance at a live performance are using their eyes, ears, and bodies to process music, not just their ears. Musicians can actually employ a kind of “live EQ” when they perform in front of people.
Using dynamics, acoustics, and visual cues, musicians can direct the audience’s attention to different musical instruments and different melodies.
In other words, listening to live music is a much more engaging experience than hearing recorded music. It’s impossible to replicate this control over the audience in a studio setting. (Live albums are the exception to this rule, but they are often targeted at audiences that are already fans of a band’s studio recordings.)
Recorded Music Is Preserved As-Is
Equalizers can instead direct the ears of the listener to the best parts of the recording. This is especially important when you consider that recorded music is preserved as-is.
Popular songs are replayed again and again. If you want your song to gain any traction, remember that repetition can make slightly annoying songs much more annoying as time goes on.
Even if listeners love your song at first, they will quickly tire of listening to it if it sounds muddy or scratchy.
Adjust for Studio Acoustics
Different recording spaces will provide different sonic advantages and disadvantages. Some studios are specifically designed to get the best sound out of all instruments; some studios are just living rooms with microphones.
If you find yourself in a less-than-ideal recording space, you may find that some instruments sound very far away or that the recording sounds thin in general. You may have trouble distinguishing between the different parts.
You may even listen to your recording and find that the mics have picked up the very loud buzzing of the air conditioner. No matter what genre you’re playing, the sound of an AC will detract from the sound of the music.
EQ technology may not be able to erase these problems entirely, but it can cut down on them to a surprising degree.
This way, you won’t need to book an expensive studio just to avoid the sound of AC.
Competition
Like it or not, listeners are mostly accustomed to clean-sounding recordings with high production value. Even bedroom musicians who produce low-budget “indie” sounds utilize an EQ to get their sound “just right.”
In order to edge out the competition, you’ll want to at least be producing recordings at the same level of quality as your favorite band in your genre.
You don’t have to mimic a highly-processed pop sound to use an equalizer to your advantage. The point is not to make the sound perfect, just to balance out the recording.
What Are Frequencies?
Frequency refers to the number of times anything occurs over a certain unit of time. In sound mixing, the term “frequency” refers to audio frequencies. Audio frequencies are soundwaves, vibrations within the range of human hearing. Equalizers can identify each of these frequencies and emphasize or de-emphasize them.
Audio frequencies are measured in hertz (Hz). One hertz is one cycle per second. The human hearing range is typically between 20 and 20,000 Hz, though as we grow older, that range narrows.
Knowing the different kinds of audio frequencies that can crop up in a song is critical to mixing it.
You need to be able to identify what kinds of sounds are produced in which frequency ranges.
This video provides a helpful visual guide to the different frequencies. Keep in mind that the terms and specific ranges for audio frequencies vary depending on the source you’re using.
This video refers to the highest frequencies as “presence” and “brilliance,” rather than “treble” and “air,” but it will still help you identify these frequencies:
Sub-Bass
This applies to any frequency under 60 Hz. Sub-bass is difficult to hear without high-quality speakers or headphones. Bass guitars and low-frequency drums are the instruments that live in this range.
The use of sub-bass in pop music is a relatively new phenomenon. Before the year 1950, the lowest frequency that was widely transmittable was 100 Hz.
The introduction of subwoofers made sub-bass frequencies much more common in entertainment. The first patent for a subwoofer was filed in 1964 and produced frequencies as low as 15 Hz, and popular music has made use of these frequencies ever since.
When discussing sub-bass, people often say that it is “felt” and not heard. If you’re listening to music on laptop speakers, you likely won’t be able to hear the sub-bass at all.
If you plan to mix music, hearing the sub-bass is probably important to you, and you’ll want to invest in a nice pair of headphones.
For a powerful subwoofer that won’t break the bank, the Polk Audio PSW10 Subwoofer has 100 watts of power and reaches low-frequency levels. It’s under $200 and one of the most popular subwoofers on Amazon.
Bass
Bass frequencies are between 60 and 200 Hz. The rhythm section typically lies somewhere in the bass frequency, particularly bass guitars and kick drums. Bass frequencies are the lowest that listeners will be able to register.
Boosting the bass frequency will “warm” the track while cutting it can take muddiness away.
Careful when cutting the bass, however, as it can make the track thin. Adding too much will make the track overly “boomy.”
Low Mids
Mids are a larger group referring to any frequency between 200 and 6000 Hz. Since this group encompasses such a wide range, it’s helpful to divide mids even further into Low Mids, true Mids, and Upper Mids.
Low Mids range from 200 to 600 Hz. Isolating this frequency can provide a hollow sound like the song is being played from inside a cardboard box.
This is a critical frequency for sound mixers because a lot of “buildup” gets stuck in this range. Buildup refers to the phenomenon that occurs when several instruments have a strong sound in the same frequency, adding a “muddy” sound to the mix.
Cutting the low mids can help you sound a bit clearer.
Mids
True mids, or middle mids, range from 600 to 3,000 Hz. Much of the sound focus is on the mids, as it’s one of the easiest frequencies for humans to hear.
Emphasizing the mids can lead to cool effects, such as the “phone booth” sound. This is because most standard telephones transmit frequencies of 300–3400 Hz, only slightly wider than the mid-range.
Upper Mids
Upper mids refer to any frequencies between 3,000 and 6,000 Hz. Upper mids tend to be harsher than other frequencies, and you can cut it to soften your sound.
Upper mids also provide clarity. Emphasizing vocal tracks in this frequency range can make the lyrics to songs more intelligible. Isolating them in this frequency can even lend an interesting, grungy effect.
Treble
High mids, otherwise known as treble frequencies, can range from 6,000 to 12,000 Hz. Treble can be quite pleasant in a song and effective when emphasized sparingly.
However, too much treble can make your track sound “needly.”
Air
Frequencies higher than upper mids are called air frequencies. These frequencies are between 12,000 and 20,000 Hz, right at the top of the human hearing range.
Air won’t provide much extra sound to the music, but it is “felt” similarly to how sub-bass is experienced. Air is often described as offering a “brilliant” quality to tracks.
Emphasizing air too much will be jarring, so use a light hand when boosting air!
Other Common EQ Terms
You may see some videos explaining how audio EQ works that use jargon without explaining what different words may mean. Here are some of the most common EQ lingo that you should know to follow along:
- Gain: In an EQ, the gain is the level of amplification given to a certain signal. Rather than the volume to the entire track increasing, an EQ allows you to increase the volume of certain frequencies while maintaining or decreasing others.
- Boost: Boosting a frequency will increase its gain or volume. If you boost the treble, you’ll be able to hear frequencies at the high range of the spectrum better.
- Cut: As you might expect, cutting a frequency will decrease its gain or lower its volume.
- Filters: At least one filter is typically built into each equalizer. Filters correct the audio automatically and will smooth out any inconsistent frequency responses. Most filters are only subtractive devices, though some use amplifying signals as well. If you’re new to sound mixing, you’ll want to use purely subtractive filters at first.
How To Use Equalizers To Improve Your Sound
Now that you know what the different audio frequencies are and how they contribute to your song’s feel, you’re ready to take a stab at mixing your music.
There are several things you can accomplish with an EQ program. Here’s how you can use equalizers to perfect the sound of your recording:
Assess Your Audio Tracks
Having a quality audio track is the most critical piece of sound mixing. You can alter the existing tones that are there, but you can’t completely transform them.
Start by listening to the original, unaltered recording. If you’d like, listen to the solo tracks for the vocals and lead instrumentation as well.
When you listen, try to identify any unpleasant qualities in the mix. Are there any parts of the song that sound “bad?” What does “bad” even sound like? Here’s a handy checklist of things to watch out for when mixing music:
- Are there any annoying whines, clicks, or booms on the track?
- Is the rhythm section too loud or resonant?
- Is the beat being drowned out?
- Are the vocals the right noise level?
- Are there any pitch problems from any vocals or instrumentation?
- Have the musicians pointed out anything of concern to you?
- Is the track even usable?
As a rule of thumb, your first listen to a track should reveal everything that needs to be changed. When listening, make a note of the timestamps when you hear something unpleasant.
If you have upwards of ten moments in the song that needs to be corrected, consider asking the musicians to re-record their tracks. An EQ is not magic and can’t completely transform a low-quality recording. It can only work with the frequencies that are already there.
Go in With a Firm Intention
After assessing the audio tracks and determining whether you need to make any corrective equalizing, determine any other changes you want to make. Set out to make a few specific changes to the track, and don’t stray from these ideas.
The most important thing to keep in mind when mixing your own music is that you should go in with a firm intention to achieve a particular sound. It’s easy to start playing around with different frequencies, figuring out what sounds cool, but doing too much can make the music start to sound artificial.
If there are any errors you need to fix, sounds you want to enhance, or effects you’d like to add, make those changes and then leave the song alone. If you’re mixing for someone else, send the song to them and ask what they think. Knowing exactly what changes you’ve made will allow you to reverse them if you need to.
As you become more comfortable with an EQ, you will gain the experience and confidence to improvise, assessing what the track needs as you go. Try to establish a large body of work before you start making improvisational changes.
Subtractive EQ
One of the most common kinds of EQ is called subtractive EQ. Subtractive EQ effectively removes problematic or annoying sounds that crop up in the mix by targeting specific frequencies and lowering or “cutting” them.
There are a few schools of thought on how to perform subtractive EQ. One common method is called “boost and sweep.”
To use the boost and sweep method:
- Listen to the recording, noting down any parts with unpleasant sounds.
- Choose one section of the song to focus on.
- Make a narrow band boosting a specific frequency.
- Play the song.
- As the song plays, move the boost up and down the frequency scale.
- Listen to see if you can isolate the unpleasant sound to a specific frequency.
- Pull the narrow band down to cut that frequency.
- Listen again. If the sound is still there, repeat.
However, more seasoned sound mixers will want to “sculpt” their sound rather than perform “surgical EQ” on it. Using the boost and sweep method tends to highlight every single unpleasant sound, even the minor ones. You can fall down a rabbit hole of fixing every “error.”
Overcorrecting minor changes can make the song sound completely artificial, something you want to avoid, even in electronic and dance music.
Whether you use the boost and sweep method or not, limit it to sections of the song that you think sound “off” upon a first or second listen. Never boost and sweep for every frequency throughout the whole song.
This video offers a thorough demonstration of how and when to use the boost and sweep method:
Additive EQ
Most tracks will warrant some kind of corrective EQ, but even if there is no subtractive EQ to be made at all, you’ll likely still want to make some changes to the mix by enhancing certain sounds.
Additive EQ refers to the process of accentuating certain frequencies to make them more prominent in the track. For example, if a drumbeat is less impressive than you’d hoped and you want to beef up its presence, you will probably want to boost the bass frequency.
Enhancing your song with boosts is a tool you’ll want to use with judgment. As a general rule of thumb, you should prioritize cuts over boosts, as you’re less likely to overwhelm the track that way. If making one boost will prevent you from making several cuts, however, you should probably just boost.
As you continue mixing different tracks, you’ll grow more comfortable knowing when to make boosts and cuts.
Frequency Slotting
Another equalizing technique is called “frequency slotting.” This sounds complex but is relatively simple to accomplish and can add depth and clarity to your sound.
Frequency slotting is choosing one frequency to act as a “pocket” for the melody, vocals, or lead instrumentation. You boost a frequency (most typically the mids) for the part you want to emphasize, then cut that same frequency in the same amount for every other track.
When doing this, keep in mind that subtle changes can make all the difference. Try to make conservative cuts and boosts at first.
Make sure NOT to make these changes with each individual channel. Instead, boost all the tracks you want to enhance (i.e., all guitars, all vocals, etc.) at once. Then, cut all remaining channels at once.
Nitpicking different levels of cuts for each solo track will only lead to a huge headache. No listener will be able to hear these differences, and it adds much more work for the mixer.
How To Get That Perfect Sound
Now that you’ve considered all these standard changes, you can take it a step further and alter the track in more profound ways. While you can’t change a sound completely with an EQ, you can choose to drastically up some frequencies and lower others.
There are several ways you can use an EQ to modify the sound of your music. You can make the beat more powerful by boosting the bass and sub-bass or give the vocals a “phone booth” effect by boosting the mids.
The best thing you can do when learning how to mix is learning how to pick out different frequencies and identify any opportunities to balance out the sound. Once you can do that, you’ll start to gain more confidence and get an instinct as to where and when you need to make changes.
Also Read: How To Optimize Your Equalizer Settings for the Best Sound
You may not want to try out altered sounds on tracks you mix for others until you have some experience under your belt. Make a few sample tracks so you can test out what boosting and cutting different frequencies will do to your mix. That’s the most basic way to use EQ.
Common Pitfalls To Avoid When Using an EQ
Experimenting with drastic EQ changes can produce some unexpected, exciting results, but it can also go very wrong!
With that said, there are some tactics you should avoid when using an equalizer.
Hoping To “Fix” a “Broken” Recording
Equalizers are not magic, and they can’t add a sound that isn’t there. If a vocalist is chronically off-key, a drummer is completely out of rhythm, or you can barely hear an acoustic guitar above a whisper, no EQ technique will help you.
It can be intimidating to ask that someone re-record a track for you, but it will save you time and your client’s money. Don’t turn to an EQ to fix a broken track!
Overmixing
As an experiment, choose a song that you’ve already mixed and perform the boost and sweep technique on every frequency throughout the whole song, cutting every single “mistake” you find. Then, listen to both mixes.
You’ll likely notice one of two things:
- The second mix sounds too perfect
- The second mix sounds no different from the first mix
Boosting and sweeping entire tracks is, unfortunately, a common practice among novice sound mixers. Overmixing will ultimately make your song sound unnatural and can even rob the track of its sonic character.
Applying EQ to Solo Tracks
While you can isolate solo tracks with an equalizer, it’s usually not worth it to go through and balance the EQ of each solo channel. Listeners will never hear the isolated solo tracks, only the full mix.
Furthermore, making too many changes to individual tracks makes it easy to lose track of what you’ve done, and therefore harder to undo it.
There are exceptions to this rule, such as when you are frequency slotting a lead vocal or instrument track.
Some seasoned sound mixers will scoff at this advice. You may soon develop a technique for EQ that may or may not follow all the commonly held advice, but it’s always best to use this as a starting point.
After finding a personal style, you can decide what advice to take and leave.
Relying on Charts
You’ll come across many charts and “cheat sheets” across the web that will help you find where different instruments lie on the frequency chart, such as this excellent one from Sweetwater.
Printing out charts like this for reference can be incredibly helpful if you are ear training on different instruments.
That said, you shouldn’t keep charts handy when you mix music. Relying on charts is a slippery slope; it can force you to focus on solo tracks instead of the full mix and will also prevent you from developing an instinct for where you should make boosts and cuts.
If you’d like, take notes on the changes you make to a mix, then compare it to the charts afterward.
Summary
Using an equalizer to get that perfect sound is simple if you develop a good sense of what cutting and boosting different frequencies will do to the sound.
Use cuts to minimize noises you don’t like and boosts to enhance sounds you do. You can even use frequency slotting to create a “pocket” for the vocals or melody.
Always keep in mind that equalizing technology is not magic and can’t completely transform any recording. It can, however, be a useful tool to make your audio recording a much more pleasant listening experience.