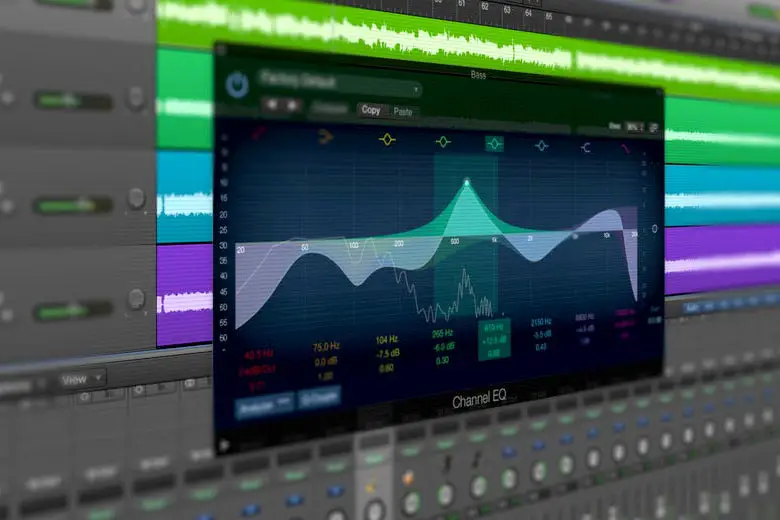
If you’re learning about how to use an equalizer, the chances are that you’re already an audiophile, or you’re on your way to becoming one. Using an equalizer is a great way to get the best sound out of your music, whether it’s music you produced or an album you just purchased.
To optimize your equalizer settings for the best sound, start by decreasing the volume on frequencies that seem piercing, jarring, or otherwise too loud. Then, increase the volume for the entire set. You can also follow the guidance of sound professionals who make presets that you can use.
This article will discuss the ins and outs of the equalizer so that you can understand how to get the best sound. Keep reading to learn more!
Why Do You Need an Equalizer When You’re Mixing Audio?
An equalizer manipulates frequencies to hide or emphasize different sounds. You can apply one of two different kinds of gains: cuts or boosts.
Cuts decrease the volume of a given frequency at one point in time, where a boost increases the volume. An equalizer typically has a smoothing effect, resolving the jagged points on a soundwave into a neat curve.
When Should You Use an Equalizer?
There are several reasons why a recorded sound might need adjustment, whether it be permanent or situational. The human ear can only hear frequencies between 20 Hz and 20,000 Hz, and when sounds begin to approach those ranges, they sound softer than they actually are. As a result, those outer limits might need boosting from time to time.
An equalizer also allows you to account for differences in room size and acoustics when you’re playing audio.
They were initially used to “equalize” the sounds in live venues without even acoustics. Live venues still use equalizers because the space that audio is played in makes a big difference in whether you’ll hear the bass, midrange, or treble more prominently.
There are also many reasons why you’d need an equalizer for your car audio. Here, you’re not able to readjust your speakers, and you can’t do very much about how the sound travels. Your best bet is to use an equalizer to cut or boost different frequencies. Although some cars have an equalizer built-in, you can also find one to install after-market, like the Clarion EQS755 (link to Amazon).
An equalizer balances different frequencies and other sound signals so that no sounds are lost, either through the compression process or due to masking from other sounds. Without an equalizer, particularly high or low notes may be cut off or drowned out by more dominant sounds.
An equalizer also draws out sounds that you want to emphasize. For example, if you’re looking for the effect of heavy bass or want to make the high notes more punchy.
Where Can You Find an Equalizer?
Equalizers are built into almost every device with a speaker, from phones to wireless speakers to a home theater soundbar. You’ll even find equalizers in Spotify, Apple Music, and other streaming services.
These equalizers are pretty simple, often including presets like “Bass Booster” or “Rock.” If you’re looking for more sophisticated equalization, you’ll need software like:
- Avid Pro Tools
- Bellari Audio Rolls EQ570 Graphic Equalizer (an analog equalizer)
- Precision Power E.7 Parametric Equalizer
The parametric equalizer is similar to the graphic equalizer but more complex.
You can also find auto-equalizing software like SoundID by Sonarworks. This software has artificial intelligence that notices irregularities in the sound production in your headphones and adjusts for them.
The mobile app also allows you to take a test to determine your preferences and then tailors your future edits accordingly. You can also tweak the sound yourself.
Some instruments have built-in or specialized equalizers, like a guitar, bass, or keyboard. They work much the same way that other equalizers do, but they influence the sound as it’s being produced instead of after being recorded.
See this JOYO Equalizer for the Guitar as an example, which plugs directly into your guitar and the audio output device.
Graphic vs. Parametric Equalizers
Graphic and parametric equalizers are very similar in how they work but have a few differences. A parametric equalizer is typically more precise than a graphic equalizer and has more ways of impacting the sound beyond volume. It’s also typically more expensive.
That’s because a parametric equalizer has more points of contact with the sound. A parametric equalizer can influence virtually any frequency, where the average graphic equalizer can influence 5 to 10 different frequencies.
Graphic equalizers are popular because they’re simple and intuitive and allow you to access frequencies across a broad range. Many people prefer to use them because they’re seen as more cost-effective.
Parametric equalizers are ideal for professional studio settings where every detail counts. They’re more complex and expensive but allow for more control over the sound.
These typically take some experience to know how to use optimally because there are so many ways you can slightly or majorly adjust the sound.
What Do the Settings Mean on an Equalizer?
You’re probably familiar with the three main knobs on a built-in equalizer: bass, mid, and treble. These allow you to play sounds up or down based on frequency.
But things become more complicated when you start adding effects like reverb and filters.
Some equalizers come with presets that arranges all of these settings for you based on the type of music.
Settings on a Graphic Equalizer
A graphic equalizer is divided into a set number of bands representing several different frequencies, with sliders for each one.
For example, a five-band graphic equalizer would generally have sliders for low bass (30 Hz), mid-bass (100 Hz), midrange (1kHz), upper midrange (10 kHz), and treble (20 kHz).
Each band is a point where you can either increase or decrease the volume. While there is some influence on the surrounding frequencies, the primary change happens at just one frequency.
More bands mean more control over the spectrum of frequencies. Each of these frequencies can be boosted or cut, and having more bands allows you to execute these gains at more points along the soundwave.
Professional music equipment typically has between twenty to thirty different bands.
When you execute gain, the sounds surrounding that point of contact change along with it, forming a slope from the original volume to the volume of the point affected by the slider. The further you push the slider, the steeper the slope will be.
Settings on a Parametric Equalizer
A parametric equalizer allows you to set the primary frequency, change the bandwidth of each frequency, and give you control over the volume.
Unlike a graphic equalizer, a parametric equalizer allows you to make many points of contact across a soundwave, sometimes every 5 Hz, depending on your model.
Changing the bandwidth of a frequency allows you to control the shape of the sound.
You can decide how much of the surrounding frequencies you want to impact when you adjust one frequency and how much slope you want them to have.
Parametric equalizers also allow you to use a Shelf mode, which will enable you to set a maximum frequency by using a low-pass filter or a minimum frequency by using a high-pass filter.
Understanding Presets
You may have seen equalizer settings like “Rock” or “Techno” and wondered what these mean. Basically, a preset adjusts frequencies in a way that tends to be helpful across an entire style of music.
It’ll change all of these settings for you at once so that you don’t have to optimize your settings yourself, or you can use this as a starting point.
Although most professionals wouldn’t go near a preset, they’re very helpful for the everyday listener and people who are just learning how to use an equalizer.
Bands: A Breakdown
Most equalizers will have at least five bands separating different frequencies.
Let’s look into what kinds of sounds represent these different band frequencies and tips for bringing the best out of them.
| Band | Description | Examples | Tips |
|---|---|---|---|
| Super Low (about 20 Hz to 60 Hz) | The lowest audible sounds a human can hear | Bass, low-pitched drums. Heard via a subwoofer | Don’t boost too much. It can make the sound too undefined |
| Lower Mids (about 60 Hz to 250 Hz) | Resonant and pleasing to the ear | Cello, bassoon, trombone, baritone and tenor saxophones, low guitar. Controlled via the bass knob on an amplifier | Boost for a melodic sound. Often boosted by music producers as a way of making the drums “pop” |
| Mids (about 250 Hz to 1,500 Hz) | Have the most clarity of the sounds we can hear | Vocals, main guitar. Controlled with the middle or mid knob on an amplifier | Boost if you want a particular instrument to cut through, but often has the same effect as boosting the whole volume |
| Upper Mids (about 1,500 Hz to 6,600 Hz) | Can be damaging to the human ear if boosted too much | Keyboard, some guitar. Controlled with the treble knob on an amplifier | Boosting can create a bell-like sound, but do it sparingly. Changes here can easily sound like distortion |
| Super High (about 6600 Hz to 20,000 Hz) | Highest frequencies that a human ear can hear. Can be stinging or ambient like background wind | Piccolo, controlled by the presence knob on an amplifier | Sometimes boosted while the upper mids are dimmed to give atmosphere without an intense piercing effect |
More Tips for Using an Equalizer
Once you understand what the different components of an equalizer can do, it’s time to start figuring out how to apply them to your tracks. These tips will help you as you apply what you’ve just learned.
Don’t be afraid to use presets! Audio professionals who know what they’re doing typically put them together for a reason.
A good method is to use a preset, then adjust from there. This will take care of all the major adjustments you need to make to smooth out the sound and fine-tune the details.
Or, if you’d rather do the whole thing yourself, you can absolutely start from scratch. If you’re going this route, your best bet is to start with simple experimentation.
Try out each of the knobs on your machine, and notice how each one changes the sound. Remember that you’ll learn how to use an equalizer more easily by digging into what the different settings sound like.
Once you’re ready to start fine-tuning a track, you can start by decreasing the level of undesirable frequencies.
It’s better to start with a decrease to get rid of unwanted sound than it is to boost what you want to hear.
Boosting too much of the sound can make it sound messy and incoherent. But do boost the volume of the entire set once you’ve made your cuts.
Best Equalizer Settings for Drums
The kick drum provides energy to the sound, where the snare offers texture. If you want to boost the kick drum for higher energy in the sound, boost frequencies between 50 and 100 Hz.
If you want more texture, try boosting the snare at frequencies between 500 and 3,000 Hz.
Boosting your highs and lows while cutting the mid-range is known as making a “V curve.” A V curve will bring out your toms.
When boosting or cutting your high end, remember that a little can go a long way, and you don’t want to lose or overemphasize the sparkle of the cymbals.
Best Equalizer Settings for Guitar
The best equalizer settings for guitar depend on several things. What genre are you playing? Are you the lead guitar, or are you creating the rhythm?
Boosting your sound at around 150 Hz will give heaviness to your sound, good for someone who’s creating rhythm or for rock music. Cutting your sound at 1,000 to 2,000 Hz smooths out your tone, getting rid of an annoying “honk” that can sometimes creep in in the mid-range.
If you want your guitar to cut through the mix and really stand out, boost the frequency at 3,000 Hz, especially on lead lines.
Boosting frequencies in the treble range can easily cause distortion. But remember that distortion isn’t always a bad thing, as the electric guitar has been a key piece in the music of classic artists, like Queen’s Brian May.
Best Equalizer Settings for Voice
If you’re equalizing voice recordings, the first thing you’ll want to do is cut the very low-end, at about 60 Hz. This will remove electrical static, any rumblings from the mic stand, air conditioner sounds, and other environmental noise.
If you’re using a parametric equalizer, make sure that you use a roll-off to do this and not a shelf, which can be jarring.
If you make the recording in a small room, decrease the 200 Hz to 500 Hz range to reduce the muddying effects of the echos. If you’re using a parametric equalizer, make sure that the bandwidth of this change is no more than 6 dB, unless it’s a roll-off.
In the high range, you’ll want to boost the airy, sparkly tones while cutting the very highest frequencies. Boost very slightly around 8 kHz, and then roll off around 18 kHz. To capture the firmer, harmonic tones, boost around 5 kHz as well.
Finally, you should boost the core frequency where you notice the bulk of spoken or sung sound that needs to be intelligible to an audience. You’ll usually find this around 1 kHz to 2 kHz, but it varies depending on the tone of the voice.
Best Equalizer Settings by Genre
Presets are often determined by genre because each genre shares common themes regarding which instruments they use and how you want to balance the sound.
Below are some common genres and how they’re typically cut and boosted.
| Genre | Tips |
|---|---|
| Acoustic | Slightly boost the bass and the higher mid frequencies. This will boost the voices and the rhythm of the instrument. |
| Electronic | Boost the bass and the high range while cutting the midrange. Here, there are usually no vocals to boost. |
| Latin | Boost the bass and high range while only slightly cutting the midrange, and maybe not touching the midrange at all depending on the strength of the vocals coming through. |
| Classical | Boost everything, but boost more heavily in the 2 kHz – 4 kHz range, the 250 – 500 Hz range, and around 32 Hz. |
| Pop | Boost the midrange to emphasize vocals and cut the high and low ranges. |
| Rock | Boost the highest and lowest frequencies the most, and slope downward to a midpoint of 500 – 1,000 Hz, where you’ll do a slight cut. This is called the classical Rock curve. |
Conclusion
To optimize your equalizer settings, you need to listen carefully to your recordings and see if you can hear moments of imbalance that need correction.
Try adjusting the dials little bits at a time until you notice the sound smoothing out, but before it becomes glaringly obvious that you’re using equalization. It shouldn’t be so drastic that others would immediately notice editing.
If you’re still looking for help learning how to optimize your equalizer settings, try this Masterclass about using an equalizer taught by Timbaland. Or, you can find several different educational programs in audio production that would teach skills with an equalizer.