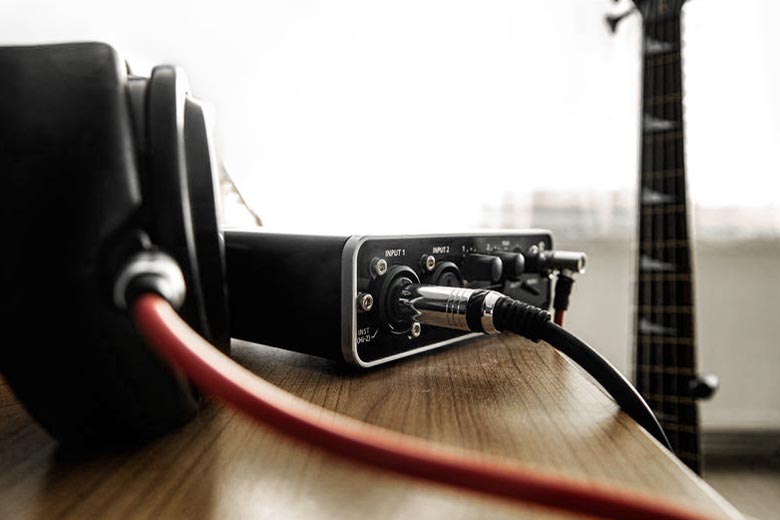
When looking at how to record high-quality sound in your home studio or office, adding an audio interface is one of the first things you’re expected to do. However, you’ll also need the right cables to connect all your hardware when you get the interface. But what are these cables?
The 11 cables you need for an audio interface include:
- XLR cables
- TRS cables
- TS cables
- RCA or phono connectors
- Interface cables
- MIDI cables
- Optical cables
- BNC cables
- AES/EBU cables
- Ethernet cables
- Power cables
The rest of the article will cover each of these cable types, with product recommendations from Amazon.com. We’ll also answer some common questions on the topic of audio interface cables, but keep in mind that you don’t necessarily need all of these, only those relevant to your setup and general hardware.
1. XLR Cables

XLR cables are commonly used in a wide range of audio applications. You’ll find them on live show stages and in studios, and they usually come with a circular connector and three pins.
They help deliver balanced line-level and microphone signals over longer distances. It’s why these cables are referred to as microphone cables in some quarters.
You’ll need one of these if you intend to use a microphone with your audio interface.
The final audio signal from an XLR cable is clean and devoid of any unwanted noise from external electrical interference. As a result, your original audio signal will remain untainted even over long distances.
The Amazon Basics XLR Male to Female Cable is an excellent example here. They are very popular, great bang for the buck, and come in many different lengths.
2. TRS Cables

TRS cables have a Tip, Ring, and Sleeve on the connecting ends (hence the name). They look like your conventional quarter-inch (0.635 centimeters) cables, but they come with an extra ring on the shaft. In addition, the lines come with two conductors and a ground.
You’ll need a TRS cable to deliver left and right mono signals from your audio interface to your stereo headphones. You may also need them to connect balanced equipment.
The HOSA REAN 1/4″ TRS cable is an excellent example of a product you can buy at Amazon. The plugs are nickel-plated to ensure extra durability, and you can choose cable lengths between 5ft and 25ft. (1.52 m and 7.62 m)
Also Read: Can Phantom Power Pass Through TRS?
3. TS Cables

These are similar to the TRS cables, but they only have a Tip and Sleeve and no Rings. Thus, they are helpful for only unbalanced or 2-conductor operations.
If you want to connect your guitar to the audio interface, you’ll need one of these.
An insulator ring separates the tip and sleeve. The tip carries the signal while the sleeve holds the shield or ground.
The Cable Matters 2-Pack TS cable is an excellent option to consider here. It’s 6ft (1.82 m) long and features a flexible cable jacket that allows easy installation and use.
4. RCA or Phono Connectors

If you intend to connect a CD player to your audio interface, you’ll need these cables. They are useful for connecting most types of consumer stereo equipment.
In addition, some users go with these cables when they need to set up S/PDIF connections.
The AmazonBasics RCA Adapter Audio Stereo Cable is our recommendation here. It delivers clean and clear signals thanks to the dual-shielding and polished metal connectors.
5. Interface Cables

Without an interface cable, you can’t connect your audio interface to your computer. There are three options to choose from:
- Thunderbolt. You’ll find this as a connection option on most high-end audio interfaces. They deliver extremely fast data transfers (dozens of Gbps). The Cable Matters Thunderbolt Cable can support up to 20 Gbps data transfer rate—a rate only possible with PCIe processing cards in the past.
- Firewire. This connection option is another one you should expect to only find on pricier audio interfaces. The cables will transfer at speeds slower than thunderbolts but still fast enough for most use situations. The Cable Builders IEEE 1394 Firewire 400 iLink Cable can deliver up to 3 Gbps of data transfer. The nickel-plated shells and thick jacket means it’s a very durable option as well.
- USB. Your standard USB cables can also connect your audio interface to your computer. Still, as you’d expect, the speeds can’t quite match what you’ll get from firewire or thunderbolt cables (unless your interface supports USB 3.0). However, they are your only option on cheaper audio interfaces.
6. MIDI Cables

MIDI cables are useful if you’re connecting different electronic instruments and similar units to your audio interface.
The MIDI abbreviation refers to the encoding language of the cables, which is Musical Instrument Digital Interface. The language allows the line to seamlessly interpret a range of musical information such as velocity and notes.
These cables aren’t as popular today because USB cables can also transfer MIDI data to a computer. However, the Monoprice MIDI Cable is a terrific option to go with if you need one for your setup. It’s ROHS compliant and very durable.
7. Optical Cables

Optical cables or “light pipe” cables function by carrying multiple channels of digital audio through one line.
It accepts a variety of signals, including ADAT and S/PDIF. While the latter carries two audio channels, the former carries eight channels at 48kHz or four channels at 96kHz.
In addition, you can use an optical cable to connect a multi-channel preamp to your audio interface.
The JYFT Digital Optical Audio Toslink Cable is perfect with its premium design that’s compatible with a wide range of audio interfaces.
8. BNC Cables

These cables look very similar to coaxial cables, but they serve a different function. They are helpful in syncing the internal mechanisms of different equipment in your home studio.
Proper alignment helps prevent inadequate sampling and frustrating clicks and pops in your audio. Of course, you can get by without connecting your audio interface and similar equipment with these cables. Still, pro users with a good understanding of advanced signal routing typically use them.
You can choose the Monoprice HD-SDI RG6 BNC Cable (link to Amazon). It features a pure copper conductor and can handle up to 3 Gbps bandwidth.
9. AES/EBU Cables

These cables are easily confused with microphone cables because they look similar. However, you can pair them with a digital optical cable to transmit S/PDIF signals.
You won’t need the cables on mid-range audio interfaces, but you can find them on higher-end models.
The Hosa EBU-010 is a popular option here, and you can choose from 10-50 ft (3.04-15.24 m) long. The robust design keeps signal reflection to the minimum to ensure accurate data transfer.
10. Ethernet Cables

You probably know these cables from the days of home telephones, but they also have a place in studios. They can send multiple channels of digital audio and a power source through a single line.
They can also run long distances, delivering very low latency times. This combination of features is what makes these units a must-have.
Related article: Guide: How an Audio Interface Can Help With Latency
In some advanced studio setups, you can send up to 40 channels of audio to a mixer with these cables. The AudioQuest Pearl Cat 7 is a good example here.
11. Power Cables
Many audio interfaces, especially beginner models, don’t require a specific power cable since they can be powered through a USB connection.
Other models that do require a separate power cable will usually come with one in the box. If yours doesn’t, you’ll need to get one to power your unit.
The type of power cable needed can differ from model to model. Be sure to check what type of cable is needed for your model of audio interface before purchasing one.
Related Article: The Ultimate Guide to Audio Connector Types
How Can You Differentiate Between Unbalanced and Balanced Cables?
The main difference between balanced and unbalanced cables is in their mode of performance.
Balanced cables are generally immune to noise from interference, while unbalanced cables are prone to picking up radio frequency interference from nearby electronic equipment.
Since balanced cables have a noise filter function, they are the preferred choice in pro audio studios. Balanced cables feature three wires: the positive and negative signal wires and the ground wire.
Unbalanced cables have only two wires: signal and ground.
How Do Balanced Cables Keep Out Interference?
Balanced cables can keep out interference due to the dual signal wires and the ground wire. This combination, and how they interfere with sound, makes the process easier overall.
When an audio signal enters a balanced cable, both the positive and negative signal wires receive the same versions of the signal.
However, the negative wire’s polarity is inverted. As a result, as the two signals travel along the cable, the cables gather noise just as unbalanced cables would.
However, when the signal recombines at the end of the cable, the negative wire’s polarity reverses completely to match the positive signal. Since the noise patterns are now on opposite polarities, they will cancel out each other, giving you a noise-free original signal overall.
How Can You Differentiate Between TRS and TS Cable?
You can differentiate between TRS and TS connectors by looking at the contact points. TS connectors have only two contact points, but TRS connectors have three. The third contact point of a TRS connector confers the balanced-signal delivery mechanism on it.
So, the tip is positive with a TRS cable, the ring is negative, and the sleeve is the ground. In a TS cable, the tip is the positive, and the sleeve is the ground with no other additions.
TS Cable
One black ring
TRS Cable
Two black rings

How to Choose the Best Audio Interface Cable
The best audio interface cable to use will come down to the unique needs of your studio. Choosing the right option is the best way to ensure excellent sound delivery.
Every studio setup has its unique needs. Even the best pro-grade components may combine in a way that won’t deliver the sound you’re going for. Therefore, any rules on how to set up a system will not work for everyone.
Don’t hesitate to experiment until you get the sound you’d prefer.
A good tip is to try both balanced and unbalanced cable connections. You should also try different cables for your audio interface to computer connection. Hold a few recording sessions with each cable type or setup and see how they sound. Then, go with the option that matches your expectations the most.
If you’re looking to set up an audio system that will give you more powerful audio for recording speech-based content, you’re probably better off upgrading your computer sound card and cutting out the wires.
However, if you’ve already bought an audio interface, it’s best to put it to use in the best way possible. Still, a balanced or unbalanced cable set won’t change your results significantly in that use case. For music recording, the dynamics change a great deal. You have to use a cable connection that’s in perfect sync with the rest of your equipment, hence the need to test different cable configurations.
Keeping Your Audio Interface Cables Organized
With all of these cables in use around your studio, keeping them organized might feel like a chore sometimes. Fortunately, there are a few options available to you.
You can keep your cables organized by switching to snake cables, buying cable winders, or learning to solder cables to match the exact length you need.
Let’s look at these options below:
Switch to Snake Cables

Snake cables are an excellent solution when you have too many lines to deal with.
These units combine multiple cables in one, which allows you to reduce the clutter in your studio space significantly. In addition, you can relocate your studio equipment to more convenient locations without worrying about managing multiple connections.
Most snake cables feature multiple connection options but go for a unit that has the connection options you need the most.
For example, this Monoprice 12-Channel Snake Cable comes with 8 XLR and 4 TRS points. Similarly, you can find snake cables that combine RCA cables and Optical cables, etc.
Buy Cable Winders
If you have a pro-grade studio with lots of wires, using cable winders will sound impractical.
However, it’s a good idea in a small studio where you only have 3-4 wires to worry about.
The cable winders work like the mechanism in a roll-design tape measure but with a twist. After you pull out the wire length you need, the winder locks the length in place. Then, tugging at the base of the unit will automatically roll the cable up.
The Stage Ninja Retractable Shielded Cable Reel is a good example here. The unit comes in a military-grade steel housing.
Learn to Solder Your Own Cables
If you really want to fine-tune your cables to get the perfect length for your studio, learning to solder your cables could be great.
Even though this might be unnecessary for most people, some perfectionists like to have their cables the exact length required to minimize the cable clutter.
This can also be good to know for repairing damaged cables.
Fortunately, learning how to solder is straightforward if you have the right tools and don’t mind putting in some practice time. You’ll need some rolls of solder, a soldering iron, and a pair of pliers that have a wire cutter.
Here’s a YouTube video that simplifies the process:
If you’re not a DIY enthusiast, you should probably ignore this method, but it’s an easy-to-learn technique you’ll get the hang of in just a few hours of practice.
A benefit of this approach is that cables and connectors you no longer need can become a parts stash to reuse as your line needs change in the future.